Natural Dyes for Wool: Walnuts
The world around us is absolutely full of color, and humans have been attempting to discover, reveal, capture, and trade natural dye goods for centuries. Although you might be familiar with some of the most prized and well-known colors, there are thousands of everyday dye goods that surround us, waiting to be gathered, processed, and bound to beautiful yarns so that fibre crafters may enjoy them. I am utterly obsessed with discovering local sources of great natural dyes for wool and other fibres and fabrics.
I first got into natural dyeing a few years ago, encouraged by others who had already been bitten by the bug to reveal the secret language of plants around them. Now, I spend a lot of time thinking about where these colors can be found for me locally and seasonally. This process has brought a new, holistic element to my dyeing experimentation and binds my emotions more strongly to the world I live within. I do not aim to be a professional dyer: simply someone who seeks, finds, and shares. I hope that sharing my processes and experiments here will help you find a new path of your own, or potentially try something new. It’s also just so much fun to see how each of the beautiful bases from Knomad take on these natural tones.
Natural dyeing has a lot of steps and can be a little intimidating to beginners, so I’ve decided to start with one of the few natural dyes that requires one less step in the process: black walnuts. Black walnuts grow abundantly in the midwest and the southern United States and can be identified by the long, thin leaves on the tree, organized so they spread out from the center of each stem like delicate fingers. When the tree fruits, green globes the size of golf balls appear in trios, then fall to the ground. Squirrels are quick to knock them off, snatch them up and carry them away to be buried, so it’s wise to get after walnuts quickly if you’re interested in using them. I drive around my neighborhood and surrounding area a lot to see where these trees are located, then revisit them during their bountiful season (typically around July or August where I live, leaning into September; late summer into early fall).
The edible part of the walnut–the nut–is a great source of energy and a wonderful ‘brain food’. If you don’t enjoy walnuts, I recommend you try them toasted, with a handful of dried cranberries and a bit of goat cheese on a salad, and see if you feel differently. Preparing these nuts for eating is a lot of work, in part because of how a walnut is structured. The outside of the walnut is called the hull or husk–it is bright green and turns black as the fruit rots. The kernel, the nut in the center, is the only edible part and must be removed with force. Common at-home methods include rolling over it with a car, smashing it with a hammer, or using a special vice or nutcracker. I don’t bother with all of that, so I collect walnuts that have fallen to the ground and are already showing some black spots–or I gather hulls that have already had the nuts removed by squirrels. This means that my walnuts must be put into water faster (or risk attracting creatures) but I feel this method is less waste for me personally, and it does a little landscaping clean-up for whoever has these nuts in their yard. Believe me, they’d much rather hand them off to you than deal with collecting them up before a mow.
How to Naturally Dye Wool with Walnuts
Materials
For this dye experiment, you’ll want the following materials on hand. Remember, anything you use for natural dyeing must not be used again for food or food prep at any time, and you’ll want to store it separately to avoid any cross-contamination.
- A large stainless steel or aluminum soup pot or stock pot
This should be big enough to hold 1-2, 100 g skeins of yarn, covered in water and fully submerged with room to move around.
- Dedicated tools: measuring cup, spoon for stirring
- A heat source
This could be your at-home stove with good ventilation, a hot plate, a propane burner or even a crock pot. If you’d like to use an upcycled crock pot, you will not need the stock pot, but it will need to stay fully dedicated to natural dyeing as dyes are not food safe.
- A water source
Natural dyes do use a lot of water–for prepping your fibres, creating dye baths, and rinsing finished yarns. You can use rainwater if you like, especially if you find your tap water is influencing your colors negatively. You can test your water’s pH with strips and see how ‘neutral’ it is if you like.
- 1-2 lbs of walnuts or walnut hull dye powder
Still in their husks, or husks only. Gather walnuts that are still mostly green, but have fallen to the ground and do not have visible bugs or rot. You cannot use just nuts, you must have the husks–husks alone are fine, if you find a partial left behind by a squirrel! I have also included a link for walnut powder if you cannot get walnuts where you live, if they are out of season, or you don’t have outdoor space for a bucket brew.
- A 3-gallon bucket or equivalent size container
This will hold your walnut brew while it becomes dye liquid concentrate.
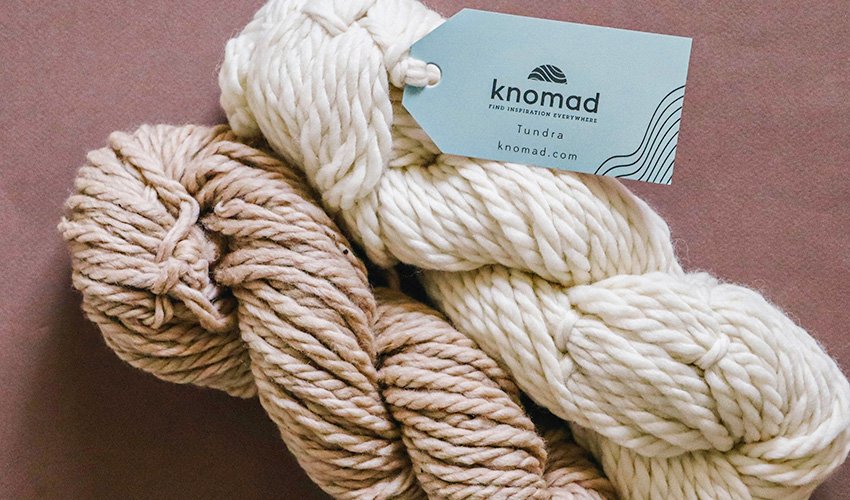
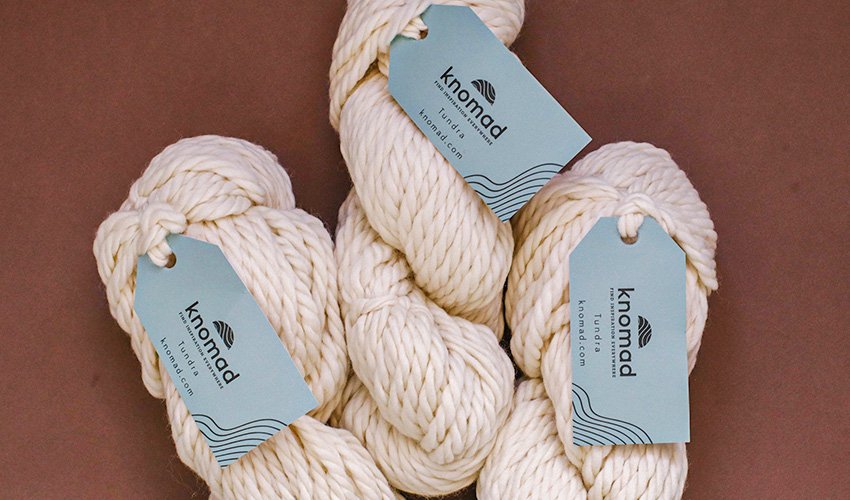
- 2 skeins of Knomad Tundra
For this dye experiment, I am using a 100% Andean Highland (Peruvian Highland) wool, non-superwash, from Knomad. Tundra is a softly spun, bulky weight yarn perfect for chunky, quick knits.
- Old clothes
Walnuts will stain anything and everything, and since they require no mordant to bind to a fibre, they’re going to leave behind a shadow even if you rinse immediately. Don’t risk your favorite clothes to stains!
- Gloves
Rubber gloves or kitchen gloves, which can be re-used multiple times, are my preference here. While most natural dyes are perfectly safe to handle with your hands, you’ll be washing, rinsing, and in and out of water a lot, which can damage your nails and cuticles. Keep those knitting hands pretty and get some gloves.
Step 1: Gather your walnuts and put them into a big bucket, then cover with water. I prefer to use a bucket with a lid so I can hammer the lid on. You’ll let your walnut ‘stew’ sit for a few weeks to break down the hulls in water and release a beautiful, almost black dye. This dye is actually a very, very deep brown. Be prepared–when you open the bucket, those walnuts will be stinky! Natural dyeing is not a scent-free process, but you’ll get used to it, I promise. I have an ongoing walnut dye bath that continues to break down over time–it will stain anything it comes into contact with, so be careful!
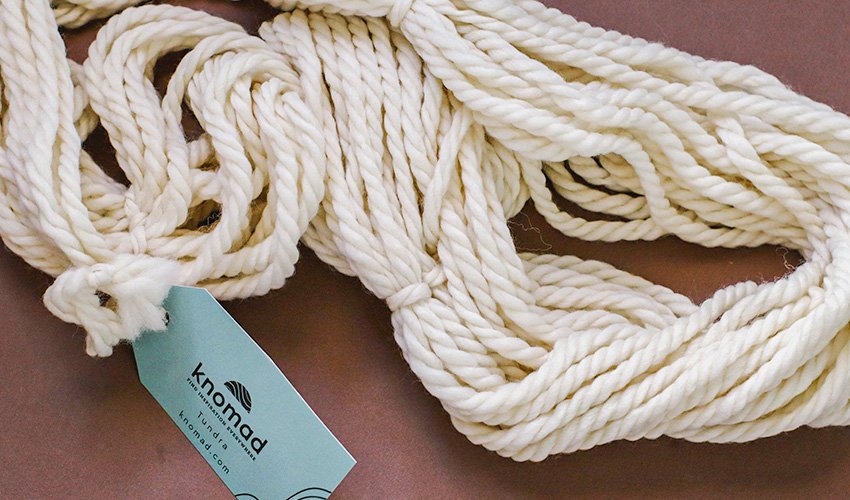
Step 2: When your walnut bath is ready, begin by prepping your fibre. Knomad pre-scours and washes their yarns before shipping them to us, so there should be no need to heavily clean the fibres–simply remove the tags, leaving all the ties, and open the hank into a big loop. Add reinforcement ties if you feel they’re necessary, and soak the fibre in warm water for an hour to get it fully saturated.
Step 3: Use a measuring cup, recycled jug or can to collect approximately 2 cups of concentrated dye liquid from your bucket for a dye bath. You can transfer this directly into your stainless steel or aluminium dye pot, and fill the pot halfway with water, using a spoon to disperse the dye liquid as evenly as possible. If you can see to the bottom, add more dye concentrate from your bucket.
Note: The ratio for walnuts is somewhat variable. For medium/dark shades, you’ll want approximately as much dye liquid as there is fibre, and for lighter shades, a little less. If you want to get fancy and do the math, you’re looking for the weight of your fibre (100 g) to match the weight of the extract bath (100 g) for a 1:1 ratio, or less for a lighter color. If you choose to use the hull extract powder, you will want to follow the directions for color on that packaging. I am not a very exacting natural dyer, since I don’t plan on repeating colorways perfectly every time, and I generally just eyeball what feels ‘right’ in terms of color depth.
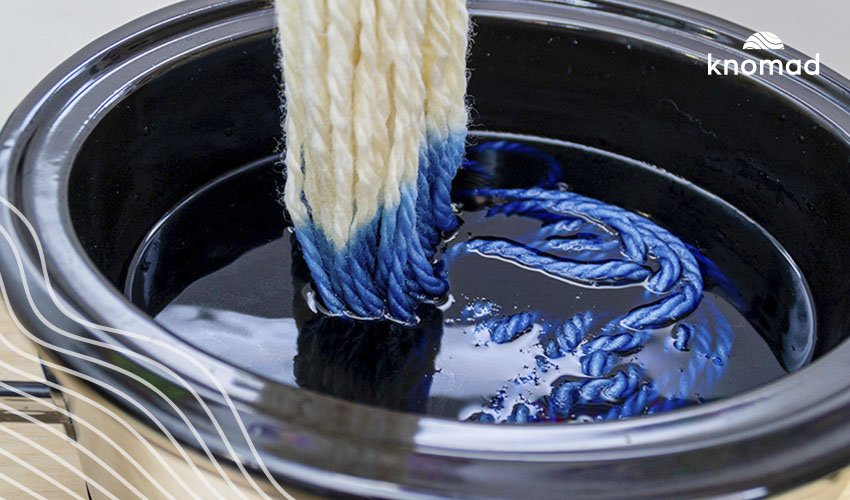
Step 4: Drain the water from your yarn soak, and push a little of the extra retained water out with your fingers. Not too much–liquid being held by the fibre will help draw the dye into the yarn, so we don’t want to take it all out and risk too much splotchiness in the final fibre. Add your yarns genty to the dye bath, making sure that yarn has enough room to move around but is mostly submerged in the pot. If you need more water, it’s okay to add some here.
Step 5: Place your pot on the heat source of your choice and increase the temperature gradually to a heat just under simmering. If you have a thermometer, you’re going to first lift the temperature to 90 F (32 C), stir, and then lift the temperature again to 180 F (82 C). I don’t have a thermometer, so I just eyeball it, and that’s okay too. You want the water hot enough for steam to be rising off it, but not so hot that it’s bubbling, boiling, or moving your yarn around for you. Keep the dye bath at this temperature for an hour, stirring occasionally to move the fibres around and keep them from collecting dye only on one side. After an hour, turn the heat off and let it cool.
Step 6: Lift a bit of your yarn from the pot and evaluate the color–remember, it will typically be 1-2 shades lighter than what you see on the wet fibre. If you like the color as-is, remove the yarn from the pot and move to the next step. If you would like to see the color deepen or strengthen a bit, leave it in the pot overnight, stirring one more time before you go to bed.
Step 7: Remove your yarns from the dye bath and smoosh out some of the extra dye–set the wool aside. Fill a sink, basin or bucket with room temperature water and add your yarn, moving it around with your hands to allow dye release. When the water is dark, drain it and do this step again. Rinse until the water is mostly clear to insure that no dye particles will transfer to hands or clothing while working with the finished yarns. If you want, you can add a little bit of wool wash to one of these rinse baths to improve the softness and scent of your finished yarn.
Step 8: Hang your hanks of yarn to dry out of the direct sun (I like to use a portable hanging rack in the bathtub). They will drip a little bit, so if you need to dry them indoors, I suggest putting them in a bathtub or in a room with a drain (like a basement). Depending on your humidity and weather, it can take 1-2 days for yarn to fully dry, but maneuvering it so that the same part of the hank is not always hanging down can help move this process along a bit.
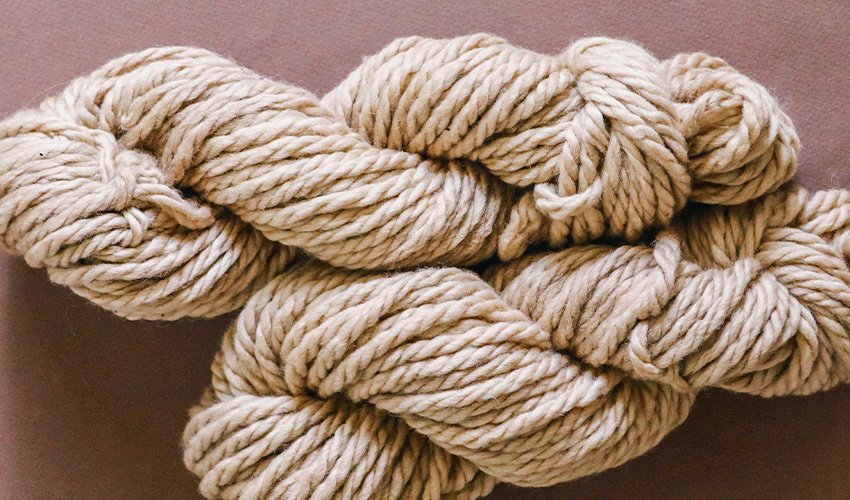
I hope you enjoyed this little tutorial for a mordant-free natural dye method using walnut hulls. This method produces a range of soft browns that remind me of coffee with a bit of cream, and look so nice when paired with the creamy color of the undyed wool. It’s already giving me lots of ideas for new projects–how about you? If you try this in your own dye studio, we’d love to see the results.
Watch our video
Tags: Beginners, indie dyers, tundra





Leave a Reply