Dyers' Toolkit
When I started dyeing, I slowly gathered up the tools that I needed over the course of a few months. Now, a few years later, I have a list of tools that I would deem essential and others that are nice to have but not necessary. Today on the blog we are going to talk about all of the tools that you need to get started dyeing! Let’s build a dyer’s toolkit together.

 The Essentials
Respirator mask: If you are using acid dyes, powdered RIT dyes, or certain mordants with natural dyes, a respirator mask is essential. These are lung irritants and a properly fitting respirator mask is essential whenever the dyes or mordants are in powdered form. My mask is a 3m half face respirator with replaceable filter cartridges. Filter cartridges should be replaced every six months. I’d recommend going straight to the 3m website to read further about respirator masks. If you are dyeing with food coloring, a mask is not necessary. Always read the manufacturer recommendations for your dye and fixatives to check what is necessary for your safety.
Gloves: In the past I’ve used disposable gloves, but recently upgraded to thick kitchen gloves that come up past my elbow. The important thing about gloves is that they are waterproof so that they do not soak up the dye. No one wants purple hands at the end of a project. You should put gloves on before opening up your dyes.
Tongs: Tongs are essential for checking on your yarn while it is in the dye bath and moving it around. I have a cheap pair of plastic tongs that you could get in the kitchen section of any value store.
The Essentials
Respirator mask: If you are using acid dyes, powdered RIT dyes, or certain mordants with natural dyes, a respirator mask is essential. These are lung irritants and a properly fitting respirator mask is essential whenever the dyes or mordants are in powdered form. My mask is a 3m half face respirator with replaceable filter cartridges. Filter cartridges should be replaced every six months. I’d recommend going straight to the 3m website to read further about respirator masks. If you are dyeing with food coloring, a mask is not necessary. Always read the manufacturer recommendations for your dye and fixatives to check what is necessary for your safety.
Gloves: In the past I’ve used disposable gloves, but recently upgraded to thick kitchen gloves that come up past my elbow. The important thing about gloves is that they are waterproof so that they do not soak up the dye. No one wants purple hands at the end of a project. You should put gloves on before opening up your dyes.
Tongs: Tongs are essential for checking on your yarn while it is in the dye bath and moving it around. I have a cheap pair of plastic tongs that you could get in the kitchen section of any value store.
 Tongs
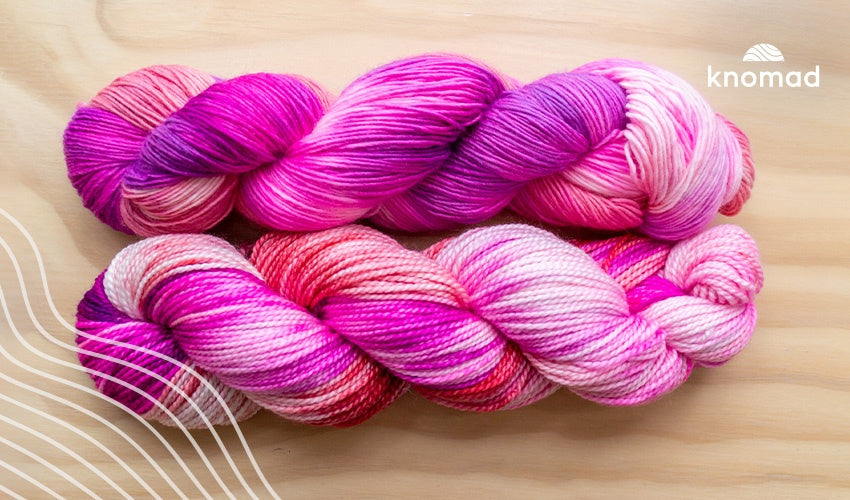
Bare yarn: Something that is special about Knomad yarn is that it is prepared for dyeing. This means it does not have any additional binding agents or chemicals that would need to be stripped off the yarn before dyeing. It is ready to go straight into your bowl for pre soaking right out of the bag! Today I am dyeing up some Snowdrift Minis with Hyacinth acid dye by Dharma.
Tongs
Bare yarn: Something that is special about Knomad yarn is that it is prepared for dyeing. This means it does not have any additional binding agents or chemicals that would need to be stripped off the yarn before dyeing. It is ready to go straight into your bowl for pre soaking right out of the bag! Today I am dyeing up some Snowdrift Minis with Hyacinth acid dye by Dharma.
 Bare yarn
Dye and fixatives: There are so many materials that can be used to dye! Personally, I tend to stick to Dharma acid dyes most of the time, however, I have dyed with food coloring, RIT dye, and avocados! (link to respective blog posts about food coloring, RIT dye, and avocados) Depending on what dye you are using, you may need a fixative. When working with acid dyes, I use citric acid as my fixative.
Bare yarn
Dye and fixatives: There are so many materials that can be used to dye! Personally, I tend to stick to Dharma acid dyes most of the time, however, I have dyed with food coloring, RIT dye, and avocados! (link to respective blog posts about food coloring, RIT dye, and avocados) Depending on what dye you are using, you may need a fixative. When working with acid dyes, I use citric acid as my fixative.
 Dye and fixatives
Measuring supplies: There are a number of ways to measure dye for your next project. Depending on how much yarn I’m dyeing, I use both teaspoons and a gram scale with a small plastic cup to measure out my dyestuffs. Whatever method you use to measure your pigment, make sure to write down your method in your dyer’s journal. (link to dyer’s journal post) I always keep my white tablespoon around because I use it to test if my dye bath has exhausted fully and it is a small, handy size. A dye bath is exhausted when all of the water is clear and this can be hard to tell at a glance without something to provide contrast.
Dye and fixatives
Measuring supplies: There are a number of ways to measure dye for your next project. Depending on how much yarn I’m dyeing, I use both teaspoons and a gram scale with a small plastic cup to measure out my dyestuffs. Whatever method you use to measure your pigment, make sure to write down your method in your dyer’s journal. (link to dyer’s journal post) I always keep my white tablespoon around because I use it to test if my dye bath has exhausted fully and it is a small, handy size. A dye bath is exhausted when all of the water is clear and this can be hard to tell at a glance without something to provide contrast.
 Measuring supplies
Bowls: The size of the bowl you need depends on how much yarn you want to dye at once. I purchased a nesting set of stainless steel mixing bowls online and can choose which size bowl I need based on the yarn. In a pinch, you could use your dye pot as your pre soaking vessel. I frequently prefer to premix my dye in the dye pot before I add the yarn so having the yarn soaking in a different bowl is more convenient for me.
Protective clothing and table cover: Dye is permanent! Protect your clothes and surfaces. You can get a cheap plastic tablecloth to protect your work surface or cut open trash bags. If you are hand painting your yarn it is often convenient to add a layer of newspaper on top of the plastic layer to absorb excess drips. Old clothing or a sturdy apron will protect your clothes from errant drops.
Nice to Have:
Salad Spinner: This is a great tool for the rinse process. I use mine once the yarn is cooled and rinsed to squeeze out the excess water more efficiently and dry my yarn more quickly.
Chopsticks: I like the agility chopsticks provide over tongs when lifting small sections of yarn to ensure the dye penetrates fully during a low immersion dye. I have a pair of stainless steel chopsticks so they don’t stain in the dye bath. Old knitting needles or skewers would also work well.
Extra bowls or a chafing dish: Extra bowls are great for working with multiple skeins at once in batches. If you want to lay down layers of color or speckles across a large surface area, a chafing dish is an excellent option. There are many tutorials on this blog showing off the versatility of chafing dishes and the different effects you can create using them.
Zip ties or shower rings: These make skeins easier to move around and fish out of the dye bath. You can find reusable zip ties as well which have the same benefits as using a shower ring to loop through your yarn. Knomad yarn comes with three, figure eight ties looped throughout the skein so they will keep your yarn from tangling in the bath. I find zip ties and shower rings easier to quickly identify in the dye bath so I prefer to use them.
Measuring supplies
Bowls: The size of the bowl you need depends on how much yarn you want to dye at once. I purchased a nesting set of stainless steel mixing bowls online and can choose which size bowl I need based on the yarn. In a pinch, you could use your dye pot as your pre soaking vessel. I frequently prefer to premix my dye in the dye pot before I add the yarn so having the yarn soaking in a different bowl is more convenient for me.
Protective clothing and table cover: Dye is permanent! Protect your clothes and surfaces. You can get a cheap plastic tablecloth to protect your work surface or cut open trash bags. If you are hand painting your yarn it is often convenient to add a layer of newspaper on top of the plastic layer to absorb excess drips. Old clothing or a sturdy apron will protect your clothes from errant drops.
Nice to Have:
Salad Spinner: This is a great tool for the rinse process. I use mine once the yarn is cooled and rinsed to squeeze out the excess water more efficiently and dry my yarn more quickly.
Chopsticks: I like the agility chopsticks provide over tongs when lifting small sections of yarn to ensure the dye penetrates fully during a low immersion dye. I have a pair of stainless steel chopsticks so they don’t stain in the dye bath. Old knitting needles or skewers would also work well.
Extra bowls or a chafing dish: Extra bowls are great for working with multiple skeins at once in batches. If you want to lay down layers of color or speckles across a large surface area, a chafing dish is an excellent option. There are many tutorials on this blog showing off the versatility of chafing dishes and the different effects you can create using them.
Zip ties or shower rings: These make skeins easier to move around and fish out of the dye bath. You can find reusable zip ties as well which have the same benefits as using a shower ring to loop through your yarn. Knomad yarn comes with three, figure eight ties looped throughout the skein so they will keep your yarn from tangling in the bath. I find zip ties and shower rings easier to quickly identify in the dye bath so I prefer to use them.
 Zip ties or shower rings
Steaming rack: I love to use a steaming rack inside of my slow cooker when I want to steam set yarn. There are other ways to steam set yarn without a rack, but this is the method that I find the easiest!
That covers all of the tools I’ve accumulated over the years and use regularly! What tools have you found essential in your dye process? Let us know and share your projects with us on social media using #knomad_yarn, we can’t wait to see what you make!
Zip ties or shower rings
Steaming rack: I love to use a steaming rack inside of my slow cooker when I want to steam set yarn. There are other ways to steam set yarn without a rack, but this is the method that I find the easiest!
That covers all of the tools I’ve accumulated over the years and use regularly! What tools have you found essential in your dye process? Let us know and share your projects with us on social media using #knomad_yarn, we can’t wait to see what you make!
 Steaming rack
The Essentials:
Dye pot and heat source: Personally, I use a slow cooker to cover both of these items in one unit. There are plenty of slow cookers available at an affordable price at your local thrift store. However, you can also use a steel stock pot and your stove or a hot plate. After certain mordants and acid dyes have been used in a dye pot, that vessel is no longer safe for food use so take care as you plan your dyeing setup. The Essentials Tongs Bare yarn Dye and fixatives Measuring supplies Zip ties or shower rings Steaming rack